
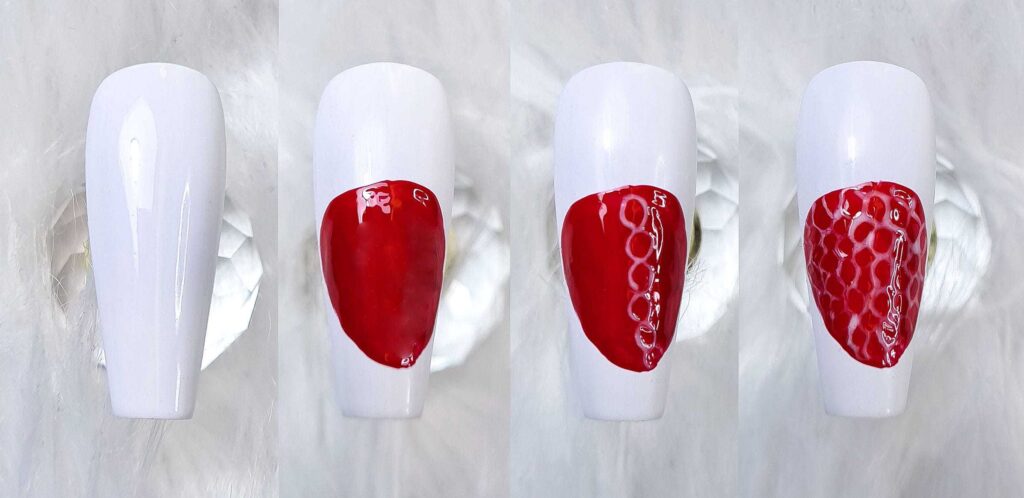
Step 1-4:
Paint the nail in any base color. I chose white.
Paint the basic shape of the strawberry in a deep red color using the Swirly brush.
Mix white with any clear (I took top coat) to get a milky white color. Then paint like a long strand of DNA along the strawberry with Swirly or Stripy. Continue until the whole strawberry is covered in the pattern. Do not cure even if you use gel.
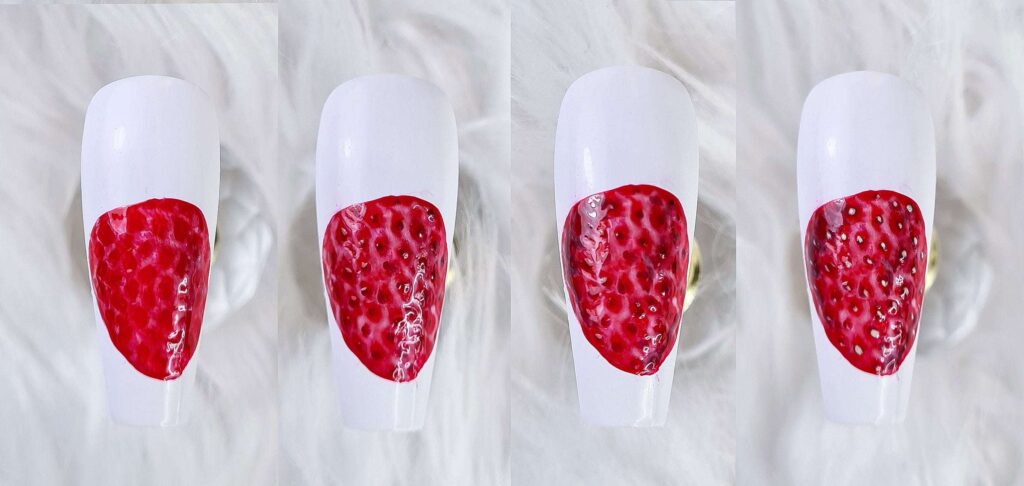
Step 5-8:
Wipe your Swirly brush and dab on the pattern to blur the edges of it.
Mix black with any clear and then paint a small oval dot in each cavity in the pattern.
After curing, use the same black mixture and dab some shade on the strawberry.
Add super-light yellow dots in the middle of the ovals.
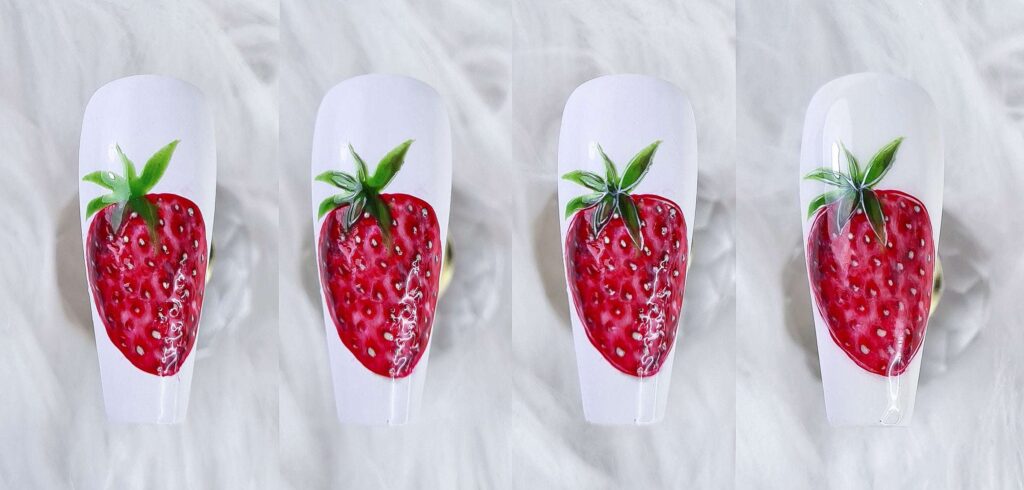
Step 9-12:
Paint green leaves using Swirly.
Shade the leaves with the black mixture.
Paint white lines just inside the edges of the leaves and strawberry with Stripy. The lines should be super thin!
Finish off with optional topcoat, today I chose a glossy.
So, now you can recreate my strawberry! Don’t forget to enjoy lots of heat, sun, strawberries and barbecues this summer and take care of each other. Talk to you soon! ❤
/ Malin Schlott – @malinsnagelkonst”

| Cookie | Duration | Description |
|---|---|---|
| cookielawinfo-checkbox-analytics | 11 months | This cookie is set by GDPR Cookie Consent plugin. The cookie is used to store the user consent for the cookies in the category "Analytics". |
| cookielawinfo-checkbox-functional | 11 months | The cookie is set by GDPR cookie consent to record the user consent for the cookies in the category "Functional". |
| cookielawinfo-checkbox-necessary | 11 months | This cookie is set by GDPR Cookie Consent plugin. The cookies is used to store the user consent for the cookies in the category "Necessary". |
| cookielawinfo-checkbox-others | 11 months | This cookie is set by GDPR Cookie Consent plugin. The cookie is used to store the user consent for the cookies in the category "Other. |
| cookielawinfo-checkbox-performance | 11 months | This cookie is set by GDPR Cookie Consent plugin. The cookie is used to store the user consent for the cookies in the category "Performance". |
| viewed_cookie_policy | 11 months | The cookie is set by the GDPR Cookie Consent plugin and is used to store whether or not user has consented to the use of cookies. It does not store any personal data. |


Hey, make sure you pick correct language here, and once you enter the site please pick the correct currency for your country before browsing the store.
On mobile you find it right below the search box.
And on desktop in the upper right corner.
Happy shopping! 